Wednesday, August 31, 2011

Flattering Trends Part 1: Color Blocking

Hey y'all, it's Caroline!

I know that trends come and go, and we often find ourselves hustling through shops, buying whatever's "in," and throwing it all on without stopping to think about how it REALLY looks on our body.

This is something you have to remember whenever you shop for that one particular trend you love: every trend looks good on a model.  When you see it in magazines, yes, it's going to look fabulous!  However, normal women have all sorts of different body shapes and can't always look that wonderful in everything they throw on.  So I'm going to be giving y'all a series on trends and how to conform them to your figure!

You have to keep in mind that these aren't hard and fast rules.  Always go with what you're comfortable wearing, and get second opinions from people you trust.  Basically, just don't wear a trend that doesn't suit you physically, or if it's out of your comfort zone.

First, let me describe the basic body shapes under which you'll need to categorize yourself.


{1}  Rectangle.  There are two types of rectangles.  One is slim and trim, and usually the body type of younger girls.  The other is a a slightly stockier rectangular shape that generally includes a broad chest and a similarly proportioned abdomen.

{2}  Apple.  An apple body shape is one with broader shoulders and a wide chest, while the rest of the body is narrow.  An apple shape, like the rectangular shape, does not have many curves.

{3}  Pear.  Girls with a pear shaped body have narrow shoulders and a narrow chest, but they have wider hips and thighs.

{4}  Hourglass.  Girls with an hourglass figure usually have a narrow waist which descends into slightly wider hips, along with, usually, broader shoulders and a fuller chest.


Now that you've identified your body shape, let's go ahead and apply it to a trend!  We'll start off with color blocking.

Rectangle:
Type 1
Rectangle Color Block


You can rock the ever-popular horizontal stripes on top and cinched skirts.  Horizontal stripes give a widening effect, and since you're so slim, this will actually help you out.  Try some skirts with a tight, high waist to give the illusion of having a bit of curve.  Plus, maxi skirts will flatter and look ladylike. You can wear flats or heels and still look great.

Rectangle:
Type 2


Rectangle Type 2 Color Block


With the stockier rectangle body type, you'll need to avoid horizontal stripes and anything that can cut you off.  Try a white tee with a funky colored jacket or blazer, and pair with a bright colored shoe or bag.  Add bright and bold accessories, and combine with some boot-leg jeans.

Apple:

Apple Color Block


Because you have more width on the top than on the bottom, you're going to need to do a balancing act. Wear slimmer fitting (but not too tight, obviously) clothing up on top, and keep it simple.  On the bottom, you can wear bubble, a-line, or belted skirts and horizontal stripes to add more volume to your lower half.  You look best in heels, which balance out the wide skirt, but of course, flats look good on everyone, too.

Pear:


With a pear shape, you have to balance out your narrow top with your fuller lower half.  Do this by picking shirts with detail, like ruffles, up at the top.  Wear a-line skirts, which are universally flattering for girls with curves.  Avoid horizontal stripes on the bottom, and the ever popular pleats can also have a widening effect.

Hourglass:

Hourglass color bloc


With an hourglass figure, you can work a wide variety of looks.  The best, though, are pencil skirts with floaty, un-structured tops, and dresses with open jackets on top.  Horizontal stripes are a no-no unless they're very, very thin stripes.  Wide blocks will do you no favors.  Try florals and checks.


So here you have a basic guide to color-blocking for every body type.  Again, there are always exceptions, and you should always feel comfortable in what you're wearing.  You can add more color to your bright outfits with bags, bangles, headbands, scarves, etc, but this is just how to get the perfect top to bottom combinations that will suit you.

Have a great day!

-Caroline

Just a bit of housekeeping

Hey everyone, it's Caroline.  I don't think I ever mentioned this on the blog before, but we've got a page on Facebook now!  So if you're on facebook, search for us, and feel free to like us!  That is... assuming you actually like us.

Also, hey, remember that time I was going to do a Q&A video and then completely forgot?  Yeah.  About that.  Let's do that again.

Once more, with feeling, please leave any beauty/fashion/etc questions in the comments below, and I will film a video with all of the answers to as many of those questions as I can.

And remember, guys, we love you heaps.

-Caroline

Tuesday, August 30, 2011

Back-to-school Clothing

Hello all!
My name is Lillian, and I am very excited to be writing this guest post for the lovely ladies of Dressing Room Door.  Feel free to check out my blog over at Frills and Furbelows, I sure would like to hear from you!

I am here to share with you today my clothing buying strategy, and also a (small) portion of my back-to-school- shopping list.

{Know your Style, Inspiration, and What looks good on you}
I love clothing.  I love dressing up, buying clothing, having new clothing in my wardrobe, the art of fashion, and designing and styling clothing. I mean, who doesn't right? And I know, from experience that dark blue makes me look a bit pale, and mustard yellow rarely works on me.  Drop waist?  Not so much.  And those bandage dresses?  For modesty's sake I hope none of you are wearing that.  So from experience we get to know what looks good on us and we find our own comfort zone, right?  That's a good thing.  Find your style, and what looks good on you, and soak it all up.  Look in magazines and blogs to see what new trends you like, so that you can absorb those trends, and come up with a unique look for yourself.

{-}

{-} by lilliant featuring a wool cardigan


{Make a List}
This is one of my favorite parts, because I love making lists.  So make a list of the clothing you like, the inspiration that makes you want to dress a certain way, and mull it over some.  Once you make a concrete list you can go over it and see in what ways you can edit.  You can see you already own something, or  that you can sew it yourself perhaps?  Or maybe you can see which items are most likely going to show up at a second hand/vintage/thrift store, at which the prices are lower (score) and the clothing has character.  So make a list.  You won't regret it.  

{--}


{Go Shopping}
While I really love the whole process of finding inspiration, making lists and everything, I've got to admit, going shopping is probably my favorite.  You can go into those stores choc full of awesome new clothing (or if you're entering a thrift store... new-to-you clothing) and you can go through the racks, look at the already assembled outfits on the models, and try on all the wonderful clothing you'd like to incorporate into your wardrobe. Awesome.  Go ahead and try new things on in the store, but remember, if you feel the slightest bit uncomfortable in whatever you try on, you're probably not going to wear it at home.  So go ahead and try it on, figure out what you'd wear it with, and make sure you love it.  

{---}


So.  Here are some inspiration boards of the things on my "Back-to-School-Clothing" wish list.  Inspired by magazines, tumblr, and the many trends showing up this fall.  

{1}  60's and 70's Inspired: flowy, sheer, braids, moccasins, beads, feathers, denim cut-offs, leather jackets, floral.  Bringing summery into fall.  

{1}


{2}  Patterns.  Lots of Patterns: polka dots, ikat, "tribal", stripes, plaid, and gingham

{2}


{3}  Texture: lace, wool, knit, jersey, sheer, beaded, sequins, glitter, leather

{3}


{4} Lots of Jewelry: gold, wood, chunky, whimsy earrings, bright colors

{4}


So there you have it.  A partial, always changing bit of my Back-to-school Shopping List and Shopping Strategy.    

What's on your list?

 {love}
           {lillian}

Monday, August 29, 2011

Hey, you!

Remember me? Well, even if you don't, I have a few products that have become my favorites since I bought them two days ago. Maybe I'm still on the "OMG NEW PRODUCTS" high, but they're all fabulous -- seriously.

So, on we go with the haul/favorites. And I'm Valentine, just in case you forgot. :)

Numero Uno: Loreal's True Match, Super Blendable Blush in the color "innocent flush". To be honest, I chose it because it looked nice on the shelf and I was in need of a new blush. However, I have tried it, and it looks absolutely gorgeous! I was a bit nervous about the shimmer after I swatched it, but on your cheeks, it gives a beautiful, natural, dewy effect. Love it. (By the way--the swatch is in the bottom left hand picture. It doesn't look so glittery or pink in real life, though. It's a little more coral.)

Numero Dos: NYC's Smooch Proof Lipstain in "Champagne Stain". It gives a perfect lip color for a girl like me. Personally, I like the idea of wearing lipstick, but I get turned off by most lip colors for the following reasons: 1) When wearing a dark lip color, I look like I'm trying too hard, 2) I'm always afraid it will be on my teeth, and 3) I'm always checking it to make sure it isn't coming off. This lip stain is just the right pink...it's darker than my natural lip, it looks better than natural, it's PINK :), and it doesn't smudge. (It is also swatched in the bottom left hand picture)

Numero Tres: Maybelline's One by One Volume Express Waterproof Mascara. This baby has lasted me through blood, sweat, and tears. Alright, I'm kidding about the blood part, but seriously. It won't come off. When they said waterproof, they meant it.

Numero Cuatro: This E.L.F. blush brush is really nice. I haven't lost any bristles, it's soft, and it does its job. No complaints.

Numero Cinco: THIS. Sonia Kashuk's synthetic, flat top, multipurpose brush. I've tried putting on my foundation with everything...but this takes the cake. I now use way less foundation and I don't have to use my fingers. I feel like it goes on faster.

Numero Seis: This nail polish from Sinful Colors was given to me by my aunt. I wish I had had it when summer was still in full swing! Even still, I'm going to wear it. It's a hot pink that would make Barbie jealous and I smile with every glance at my toesies.

Numero Siete: If you watch Fleur's channel on Youtube, you've probably heard her rave about the Sonia Kashuk Hidden Agenda Concealer Palette. I really like it. There's a light shade, a dark shade, a green shade (for cancelling redness), and a powder to set. They're creamy and go on very nicely.

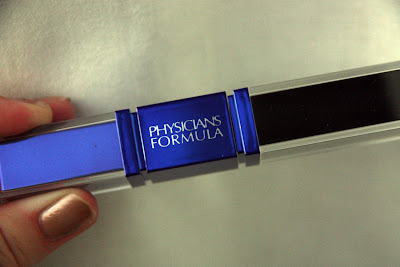
Numero Ocho: Finally, we have one of the products I have been searching for....for FOREVER. Blue Mascara! This one from Physicians Formula is two sided and comes with a black mascara as well. I'm very excited to have this. It's not quite as blue as I had hoped, but it will work! (Just a tip...It looks best, in my opinion, if you put on your normal mascara first and then add the blue to the tips.)

This concludes my haul. I hope you can get past my ugly nails. I just repainted them, don't worry. Oh, and the blue on my hands is from drawing with highlighters and sharpies this afternoon. :)

Love you, girlies! Let me know if you have any products that you think are the "bees knees". I want to hear about them!

-Valentine


Sunday, August 21, 2011

Masquerade

I'm spending the weekend with some friends, and one of them happens to be a lovely lady named Kate.  Kate's extra special, not only because she's just a wonderful girl in general, but because she's about to start writing for Dressing Room Door!  

We were feeling adventurous today, so I did her makeup in a fairytale, masquerade mask.  We had so much fun figuring it out, and spent forever on it.  I hope you enjoy, and I promise to come back soon with some more wearable posts.  :)


-Caroline

Friday, August 19, 2011

Back to the Basics Pt. 1 - Mascara

Hey, everyone!  Emilyann here, and I'm starting a new series on the basics of makeup.  Sure it's fun to dress up and "put on your face" but if you don't know how to use the products you have, it could turn out to be a disaster.  I'm here to show you fool-proof ways to use your makeup staples.

Staple number one, mascara.

Mascara is usually one of the first pieces of makeup people buy.  Mascara is used to darken, lengthen, and volumize the lashes.  It can make white eyelashes appear dark, or tiny lashes appear longer.

However, mascara isn't magic.  It doesn't make your eyelashes grow.  In fact, it can often damage your lashes if you don't take good care of them like you would your hair or your skin.  Mascara should be taken off before bed every night, because if it's on too long, or while you toss and turn in bed, your eyelashes can break off or become twisted or pulled out.  It's important to take off any makeup before bed, but mascara especially.


What kind of mascara should you use?

There are many variables: whether you're fair or dark, you have blue eyes or green, whether your lashes are short, or stick straight out.

  • For natural, everyday wear, blonde, blue-eyed fair skinned girls should wear a dark, espresso brown colored mascara.  The brown will bring out the blue and the blonder lashes will appear darker without appearing fake. 
  • Brunettes or darker skinned girls should wear a charcoal or a black color.  Black will go with every eye color.   
  • If your eyelashes don't naturally curl, invest in a reliable eyelash curler. Then a curling mascara, such as Rimmel's Sexy Curves mascara.
  • If you have short eyelashes, use a good lengthening mascara.  These are super easy to find.  Try Covergirl Lashblast Length in the yellow bottle.
  • If you have long eyelashes that aren't voluminous, try a thickening mascara like Covergirl Original Lashblast in the orange bottle.
  • If you have both of these problems, don't be scared to layer mascara.  Start with the thinner consistency first- usually the lengthening mascara, and add a volumizing (thicker) mascara sparingly.  This will give you a good combination if used correctly.
Now, what to avoid with mascara.  

The spider lashes.  


Girls often mistake the spider lashes for volume and depth.  Sure we want our eyelashes to look like we put on three pairs of falsies.  But you can do that without making them look like tree trunks sticking out of your lashline.  Line your tightline with an eyeliner, then curl your lashes.  First apply a THIN coat of mascara to the backside of your eyelashes.  Remember, THIN.  This will give the illusion of thicker lashes.  Then apply mascara in a wiggling motion, separating the lashes and making sure they're thin and many.  The problem with the spidery lashes is that it clumps them together and causes them to look like you have four or five huge lashes.  

Mascara smudges. 


It happens to the best of us.  If you accidentally brush up against your skin as you're apply mascara, don't worry!  Just don't rub it with your fingers or touch it or try to remove it.  Wait until it's dried, then go in with a wet Q-tip and it will remove like it never happened. 

Bad waterproof mascara.


Waterproof mascara won't ruin your lashes...if you use it in moderation.  Waterproof mascara has a different formula.  While protecting you from wetness, it also dries out your lashes and eventually will cause them to flake, or break off.  Only use waterproof mascara when hitting the pool or on a super sweaty day.  


If you use mascara everyday... you need to take care of your lashes.  
  • Coat them in Vaseline every night before bed to keep them long, strong, and healthy. 
  • TAKE YOUR MAKEUP OFF BEFORE BED!
  • Give your eyelashes a break at least once a week, if possible.  They'll thank you in the end.
What's a makeup staple you're not sure what to do with? 

Till next time!
Emilyann

Wednesday, August 17, 2011

And in case you're wondering, NO, I wouldn't wear this in public.

 Last night, I had the itch to play with my makeup.  I get this urge occasionally, and usually end up doing something to my face that takes roughly 15 minutes to fully remove.  But it's all fun, and it relaxes me.  I was watching Soul Surfer with the family when I did this, and I felt like I needed to do something blue.  The purple and black is purely for kicks.


No tutorial on this one... I was wingin' it.

Products used:

Foundation Primer:  Smashbox
Foundation:  Revlon ColorStay
Concealer:  Eve Pearl
Blue cream liner: Sephora brand
Black cream liner: Sephora brand
Mascara:  Maybelline "The Falsies" and CoverGirl Lashblast Fusion
Blue eyeshadow: From my 120 palette
Purple/white eyeshadow:  Too Faced (from the Romantic Eye palette)
Blush: Mary Kay "shy blush"
Bronzer: Urban Decay "baked"

That's all for today, folks!  I'll be back in a few days with a back to school, everyday makeup tutorial.  Don't worry,  I won't have you hitting the books looking like a cross between an Avatar and a butterfly.  :)

-Caroline

Friday, August 12, 2011

It is a truth universally acknowledged that a single man in possession of a good fortune must be in want of a wife.

A couple of the DRD girls and I are all taking a summer elective at our online schools, The Novels of Jane Austen.  Woman's favorite author.  It's been a blast so far, and not only have we talked about all of the Austenian heroines we love so dearly, we've also dressed up as some of them.

Last week, we had a "webcam" day where we pretended to be a certain character from the Jane Austen novels. I chose to dress up as one of my favorite heroines, Miss Elizabeth Bennet, the lucky wife of the famous Mr. Darcy and the star of Austen's most famous novel, Pride & Prejudice.  


Want to know how I achieved the look?


  • First apply your concealer.  Try using a concealer with the lightest appearance you can find.  It's important for the skin to be completely without flaw or blemish, but it should also look as natural as possible.  Benefit's Erase Paste is a good investment for looks like these. 
  • Apply a light foundation.  CoverGirl's Nature Luxe Foundation is perfect for this look.
  • It's time to contour.  Take a light bronzer *without any shimmer or sparkle* and apply it in a straight line down the sides of your nose.  This will slim and define the bridge.  After you've blended, take a contouring or blush brush and apply it to the hallows of your cheeks.  Jane Austen girls were very round-faced, but they also had very defined cheek bones.
  • Now it's time for blush.  Use a cream blush a shade darker than your natural cheek color to make the look more flushed and effortless.  
  • Austen's heroines have strong, filled in brows.  Using whatever you use to fill in your brows (I used a dark brown eyeshadow and an eyeliner brush) fill in your brows just a bit in flicking motions.
  • For your eyes, use a matte finish primer.  You won't be using any shadow, but this will take the stained parts of your eyes, along with any veins or puffiness you might have, and smooth them out.  You may also use a concealer, but a primer is much less heavy. 
  • Apply a brown eyeliner to the tightline, the outer corner, and the first third of the waterline.  This will give more definition to the white of your eye.
  • Curl your lashes and apply a lengthening mascara.
  •  Moisturize your lips with a lip balm (personal favorite is any EOS lipbalm). If you don't have the luxury of a lip primer, just make sure your lips are moisturized but not wet.
  • Now line your lips with a bright red lipliner.  You can also use the tip of your lipstick to line your lips.
  • Now spread on that red lipstick, being careful to stick to where your natural lip line is.  Nothing looks worse than a bad red lipstick job.  
  • If you mess up, never fear! Get some water on a Q-tip and smudge the corners where you spread a little too far.  Afterwards, line the outsides of your lips with the same light concealer.  Now your lips are super defined!
Now just throw your hair in a bun and curl the front pieces and you're good to go! 

I hope you enjoyed! 


xoxo,
Emilyann

Wednesday, August 10, 2011

Boho. Not to be confused with Hobo.

Over the summer, I've taken all of my brain space usually directed towards homework, and aimed it towards thinking about various and sundry absolutely non-school-related things.  One of these things has been my style.

I've never had a distinctly... describable mode of dress.  I've just worn what I like, and that's the end of it.  But I've started becoming more picky about what I wear, and certain things just strike me as more attractive than other pieces.  And I've finally learned how to describe my classification:

60's Bohemian.  I have a penchant for vintage and classic girly things, like cat-eye sunglasses and ballet flats and cigarette pants, but I am also drawn towards long, floaty things, head-scarves, and bold vintage jewelry.

Classifying my style has made shopping easier.  I no longer hem and haw over what I want to buy, wondering if it suits. I just ask myself if it at all fits under my little self-description, and act accordingly.

Hence, today's OOTD.


Jean Jacket ~ Old Navy (Slightly oversized is the bomb dot com.)
Maxi Dress ~ Steinmart
Shoes ~ Seem to be missing those.... :)
Headband ~ Either Icing or Claire's.  I'm forever confusing the two.
Cami ~ Old Navy (Camisoles are essential to most maxi dresses.)
Earrings ~  I know you can't see them.  I promise I'm wearing them.. big, dangly, silver circles.  From my mama.


I'm not actually wearing it today, but I had to show you.  My friend and I found these amazing necklaces for ONE EURO at an otherwise pricey store.  That's about two dollars, y'all.  Can I get a woop woop?  Or in this case... a "hoo, hoo."

That's it for today!

Listening to:


-Caroline

Sunday, August 7, 2011

Attempted Hair Tutorial and DIY t-shirt

I've never done this before, so forgive me if it's unacceptably horrible. Or just impossible to understand. They amount to the same thing.
So:
This hair tutorial is just an easy, not too specific, cutesy thing. It can be dressy or casual.
T-shirt DIY: I've done some pretty fun stuff with t-shirts before, (actually I've resold them, too. I used to be a super duper crafty DIY-ish person. Then highschool happened.)

First:
Brush your hair out so it looks something like that.
I have a side part, and I've never done this with a middle part, but I'm sure it would just look even MORE uber hippyish.


You'll probably need a few things other then your hair. I would start with a normal clip thing that will hold half your hair, a brush, a one inch curling iron, and hairspray! (Optional, I suppose.)
Also, a heat protect-ant for your hair. Which I didn't use. But. That's probably why I have split ends worse then a barn cat has fleas.

Two: Place the upper half of your hair out of the way using your clip. Divide the lower half of your hair onto the two sides of your neck and curl.


Three: Start at the bottom, and curl up your curling iron. (okay. I really don't know what I'm talking about. Just do the standard curling thing...that's shown in the picture.)
<


Four: Your curls should hopefully look something like that. If they don't, it's probably not a big deal.


Five:
Curl both the bottom half of your hair and the upper half like above.
Picnik can make anything look good! Even my face!
Six:
Turn that head upside down and
SHAKE IT LIKE A POLAROID PICTA.
So your hair should now look like below.
You can then add whatever headband (I wear necklaces as headbands. Don't judge me you hater.) And proceed to wear fringe, old jeans, moccasins, and belly shirts galore!
that's a joke.
I do realize that this is getting a bit lengthy. Like Herodotus long. That's real long girls and boys. However, it took me much longer to write it then it will for you to read it so suck it up babies.
Snuggy wuggy was a bear...snuggy wuggy had no hair................
Anywho. In order to properly reform your down and out t-shirts, you shall:
Cut off the hem on the sleeves.
Cut off the hem around the collar.
Cut off the hem on the bottom.
This takes about 3 minutes, and refreshes any old boring things.
(I pretty much never wear t-shirts anyways, but, that's because I'm a weirdo and I'm sure at least some of you do so this is suitable.)
Sweet niblets I need to brush my hair. But, the other plus side of this DIY is that you get a free headband from the bottom hem of your tee. Yeah!

And now for the brief food picture section! In order to make you fat and cause you to eat excessively, we share delicious pictures of greasy, secretly disgusting, and horribly mouthwatering food! (Actually it's quite healthy...)
xo Josie