Showing posts with label makeup. Show all posts

Tuesday, May 29, 2012

Brown eyes, of course

Hey Ladies of the brown eyes, you all knew it was coming.  :)
{Products used: Beauty Rush wet/dry shadow in bronzinger, covergirl eyebrightening palette in vibrant browns: cream and bronze, covergirl lashblast volum mascara}
Now I don't consider myself an expert, but here's the makeup I do on a fairly normal basis.  I have brown eyes, and to give myself contrast-y eyelids I have a dark brown with a bit of shimmer for my crease, a bit of highlighter for my brow bone and the corner of my eye, and then a bronze-y for my lid.  I also apply mascara to my top and bottom lashes.  Sometimes I forgo the lid and brow bone and just apply dark brown to my crease.  It's not a lot and just gives a bit of contrast without looking heavy(I love this particular shadow).
Obviously, brown isn't on the color wheel, but I also suggest purples and greens to bring out the richness of your brown eyes.  Try out different colors of eyeliners like Emilyann said, those are fun, or even purple mascara.  Go ahead and experiment with it.  With my light olivey skin and brunette hair, brown eyeshadow is my favorite right now.  But it also depends on my mood. ;)

Have fun ladies (and happy summer, thank goodness it's here, right?)!

lillian.

Monday, May 21, 2012

How to Enhance Blue Eyes With Makeup

Hello, ladies!  It's Caroline again.  Today I'm going to talk about how to make blue eyes stand out with your makeup.  The other girls might be putting up posts on how to enhance their eye colors as well, with either clothes or makeup, so stay tuned for those!

Let's get right down to it.  I'll just say, though, that as a general rule, you should use the color that makes you feel prettiest.  If you wear green eyeshadow every day and it makes you feel confident, keep wearing that green eyeshadow, and don't worry about makeup "rules."  But if you're not sure what colors to buy and you want to make your eyes brighter and more vivid, these tips might help you out.

Myth:  Blue eyeshadow makes blue eyes pop.

Fact:  Warm eyeshadows (brown, gold, pink, etc.) make blue eyes brighter and altogether more... Boom.

The issue with blue eyeshadow is that it can overwhelm your eye color.  A stark, bright blue might make your blue eyes look a bit dull because it might be more vivid than the color of your eyes, and a dark blue might wash out your eyes a bit.  You can always use dashes of blue, whether in your eyeliner or a bit in your crease, if you feel you've found the perfect blue for your coloring, but warm colors are generally the best for noticeable enhancement.


Blue Eye Color Enchancement

Blue Eye Color Enchancement by jabberbabywokky featuring a shimmer eyeshadow


Your best bet is to buy eyeshadow palettes that feature browns, golds, yellows, pinks, and flesh toned colors.  Here's why:

via
If you look on the color wheel, oranges and yellow toned colors are directly across from blue toned colors.  Generally, colors opposite each other on the color wheel serve to bring each other out beautifully because of the stark contrast.  Blue is a very cool color, and so warm colors make it pop.

Here is a quick picture tutorial on how I enhance my eyes.  Mine are a grey-ish blue, and I like to use dark browns and golds.  I rarely use pinks because I'm very fair-skinned and they tend to make me look tired.

{Step One} Prime the eyes.  I used MAC's Paint Pot in the shade Painterly.

{Step Two}  Put a pearly color on the brow bone to lift and highlight your brows.

{Step Three}  Apply a wash of gold all over the lid up to the crease.  I'm using a deep, true gold from a Sephora palette.

{Step Four}  Using a small blending brush, apply a light, or medium, brown shadow in the crease.  I am using a brown color from a Tarte palette.

{Step Five} Using a pencil brush, or any brush with a point, apply a slightly darker brown shadow to your crease at the outer edge, blending it inwards from that outer edge.  The brown I'm using is from the same Tarte holiday palette as the one before.  This just gives your crease a bit more definition.

 {Step Six}  Blend everything out with a taupe color or something close to your skin tone. Again, I'm using a taupe from the Tarte palette.

 {Step Seven}  Apply a brown eyeliner to your lower lash line, as close to the waterline as possible without actually putting it on your waterline.  

{Step Eight}  Using the dark brown that you put in your crease, or the lighter brown for a more natural effect, smudge out the liner a little bit.

 {Step Nine} Using your finger, apply a very bright, shimmery white or pearl shade to the very center of your lid, and a little in your tear duct area.  This will make the look more fresh and perfect for day time wear.  If you're going out at night, skip putting this color on the middle of your lid and stick to just putting it in your tear duct area.


{Step Ten}  Curl your top lashes and apply your favorite mascara to the top and bottom eyelashes.


And now you're done!  Finish off with a bit of pink lip gloss (I find pink lip gloss helps make my eyes stand out, too) and you're good to go!

Products Used:
1. Painterly Paint Pot - MAC
2.  Cream shimmer shadow from a Holiday Palette - Tarte
3.  Mix of the two gold shades from this Palette - Sephora
4.  Both dark brown colors from the Holiday Palette - Tarte
5.  Long-Lasting Natural Eyeliner - Tarte
6.  (From the bottom up) Sigma E35 Travel Brush, MyGlam blending brush, Sigma Pencil Brush, Sephora Eyeshadow Brush, Sephora Eyeliner Brush
7.  Coup de Theatre 2 in 1 Mascara - Bourjois
8.  Nail Polish in Beauty Bandit - H&M
9.  Nail Polish in Bella's Choice - H&M
10.  Maybelline Lipstick in the shade Pink & Proper, and Stila lip gloss in the shade Blush


I hope this tutorial helped out you blue-eyed girls!  Let me know what you think, and if you have any questions, I'm happy to help you out in the comments section below.  

Love, 
Caro

Thursday, May 3, 2012

April Favorites

Now that May has officially begun, I'm going to share with you a couple of things that I loved in the month of April.  Sound off in the comments on what your favorites were!

Revlon Colorstay Foundation

        I got this foundation a while ago, and I hated it.  I used it several times and regretted the purchase.  But, as it turns out, I ran out of my favorite at the beginning of April (my Maybelline Dream Liquid).  So I grudgingly pulled this out, and, whaddya know!  I love it.  I use a dense Sigma brush to blend it onto my skin, and sometimes I mix the foundation with my moisturizer if I want lighter, more sheer coverage.

via


       I'm pretty much a sucker for anything in the Maybelline Dream line.  But this powder is genuinely fantastic!  I don't love loose powders because they're messy and sometimes build up in all the wrong ways.  So this powder compact is perfect!  I press it onto my eyelids, under-eyes, nose area, and forehead after applying foundation and concealer, because those are the areas where my makeup never wants to stay.  If I do this, my makeup lasts all day.  And it doesn't look cakey, either!

via


Mary Kay Mineral Eye Color: in Espresso


       I use this to fill in my eyebrows.  I just take a small angled brush and lightly flick it through my (very dark) brows to fill in sparse areas and enhance the shape.  I love a good strong brow, and this color is perfect for my hair color and skin tone.

via

Freeman Facial Peel-Off Mask: Cucumber


       This stuff is where it's at!  I rinse my face with cool water, and pat dry.  Then, I just spread this sticky goop that smells like Heaven all over my face, and wait about 10-15 minutes.  It peels right off!  If you get it in your eyebrows or hairline, it can hurt to peel off, but otherwise it's pretty gentle.  I wouldn't recommend it for really sensitive skin, however.  I always use a heavy moisturizer when I'm done, and then my skin looks really soft and silky.

via

       I bought this on a trip and have used it faithfully all throughout the month of April!  I don't think you can buy this in the US, but you may be able to find it on Amazon or EBay.  It lengthens and plumps the lashes without making them clumpy.  I like that it makes my eyelashes look natural, but still full and feminine.  I do not dig the spider lash effect, and this mascara definitely doesn't do that.  (Not going to lie, I totally bought this because the packaging was awesome.)

via


I've enjoyed a bunch of other things in the month of April, but these were my stand-out products.  What did YOU love last month?  Do tell.

Love,

Caro
     

Sunday, March 25, 2012

Foundation Colors

Hola, hola, hola!  It's Caroline again.  This is part two to my answer for Rebekah B.'s question!  She says, in regards to foundation colors:

I'm somewhere in-between fair, and whatever comes next. Is it better to go for one that's a little lighter, or one that's a little darker? I can never use very much face powder to help tone down the shininess of my skin, because I don't really have a color to match. And another problem is, I can't really afford to get an expensive brand that comes in a lot of shades. Do you have any suggestions?

What an excellent question!

I struggle with this myself because I'm ridiculously pale.  It's very hard to find foundations that are light enough for me, and if I do, they're usually too pink toned for me.  Ugh!

We already know that Rebekah has struggles with a bit of oiliness and acne, just like many of us do.  I would actually suggest a liquid foundation, because powder can cling to acne when used on it's own.  Granted, you can use a translucent or sheer powder over the foundation, but it's best to use a water-based, sheer foundation to best even out your skin.  

So here are a couple pointers for choosing a foundation color.

          {1}  When in the store, if there's a tester, swipe a bit of the product onto your jawbone.  If it blends nicely into your face and neck, you're good to go!  You should be any darker or lighter than you were before; it should just disappear into your coloring.  If there's no tester, hold the bottle up to your jawbone and look in a mirror at the color, and ask for a second opinion if possible.  The reason you're putting the product on your jawbone is so that you can tell whether or not the color would leave an dark streak there, even if it might look alright on the other parts of your face, like your cheek or nose.

          {2}  If you're in between colors, like Rebekah, there are a couple things to do.  If you want to buy a more expensive foundation, buy one that's just a little too dark.  Then, when you get home, mix it with your favorite day-time moisturizer!  This makes the foundation last forever, makes it less pigmented, and also makes it lighter coverage.  You can also buy the one lighter than you and the one darker than you and put a dollop of each on the back of your hand and mix them, if it's not too expensive!  Then just apply as usual.  If you feel you must, must, must use powder foundation, buy a shade lighter than you and then just apply a sheer bronzer all over to give it a bit of a darker glow to fit your skin. But liquid will probably work best for you, just not oil-based foundation.

          {3}  Use a light hand.  A lot of times, girls think their foundation isn't the right shade, but really they just have an orange streak because they're not applying properly.  Put a tiny dab on your nose, chin, eyes, cheeks, and forehead, and then blend outwards to the edges of your face.  You get surprisingly good coverage from this.  To set, lightly dust your face with a sheer/translucent powder.

Best of luck!  There are a lot of different facets to this, and everyone is different.  So if you have any specific questions, comment here and I'll respond!  And as always, feel free to email us with any other questions you have. 

Love,
Caro

Saturday, March 17, 2012

Hunger Games- Capitol Makeup

Finally got myself into gear and cranked out this video!  I had it filmed, but the editing is the hardest part.

Sorry for all the delays, y'all!  School.  It's no joke.

So, here we have Capitol makeup!  The people in the Capitol go nuts with their makeup, only caring about the trends and not about being actually, well, attractive.  They wear garish colors and have nutty tattoos.

Naturally, doing this makeup was really fun.  However, removing it was an absolute mess...


And I know.  The thumbnail is super hot.  Don't be jealous.  ;)

Why I post this craziness is beyond me, but I hope you like it!  I think it'd be a fun Halloween makeup or something.  Enjoy!

Wednesday, March 7, 2012

"I volunteer!" I gasp. "I volunteer as tribute!"

"Winning means fame and fortune,
Losing means certain death. 
The Hunger Games have begun
And may the odds be ever in your favor."


Hello, everyone!  Here begins our week full of Hunger Games related Dressing Room Door posts!  Here at DRD, we love the Hunger Games.  We're possibly a little bit obsessed with them.  And what better way to fangirl than to recreate the looks we've gotten a sneak preview of in the movie. Let me know what you think!

Pre-makeup and hair, I exfoliated and cleansed my face, and washed my hair the night before.
This is my interpretation of Katniss's look during the games.  I know it isn't perfect, but I had a blast putting it together. Her makeup is simple, and her braid is pretty lovely. Her outfit consists of boots, skinny pants, a black vneck, and a windbreaker.  Not to mention the arrows, which, I obviously don't have, so I substituted for a brown bag instead. :)


Here's how I recreated Katniss' iconic braid.


For makeup, I kept it light and subtle since I doubt Katniss was stopping to reapply a cream blush every couple of miles in the games. ;) The key to Katniss' makeup is really all high lighting. It's almost better to not conceal your blemishes to get that "real" look, but if you'd like, start with a concealer.

via www.ew.com

  •  I prep my face with a lightweight water based moisturizer, and then use Vaseline as a primer.  I don't recommend doing this if you have oily skin, just stick with a shimmerless face primer, but if you have dry skin like me, this will help your highlighter stick better than a primer. I apply it down the bridge of my nose, on my cheekbones, and the middle of my forehead.  
  • Since Katniss has a very contoured and angular face, I contour my cheekbones and temples with a light, matte bronzer.
  • Then I apply Estee Lauder's spotlight as a highlight on all of the places I prepped with Vaseline.  This is a fabulous highlight, and while a bit expensive, so worth it.
  • After this I set my makeup with  Fix Plus. This gives a dewey glow and will keep your contoured look all evening/day/whatever.
  • I smudge brown eyeliner into my lashes and right above, and then spread it out using a eyeshadow sponge.  
  • I apply a thin, thin coat of brown/black mascara to my upper lashes, a quick swipe of lipbalm and I'm good to go!

Jacket - Dad's
Shirt - TJ Maxx {DKNY}
Corduroy Skinnies - Max Azria
Boots - Claire's 
Bag - Thrifted {Cherokee}
Necklace - Gift from Lillian :) <3


Now the real question, ladies, Team Peeta or Team Gale? ;)

Happy Hunger Games!

xx, 
Emilyann

Wednesday, February 22, 2012

Quick Announcement! Win Makeup!

Hey, everyone, Emilyann here!

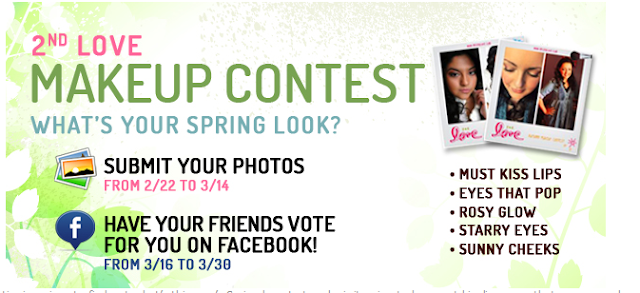
As you may remember, last fall I entered a makeup competition and asked all of you ladies to vote for me.  I won second place thanks to all of you, as well as my amazing friends and family.  This year, the same company, 2nd Love Cosmetics, is doing another makeup competition, this time for Spring!  Since I entered last season, I won't be entering this time around, but I thought I should get the word out to all of you in case any of you are looking to enhance your makeup collection.

Ps Spot my picture up there? :D

The grand prize for this contest is makeup that has been estimated to be worth $140.  There is also a second prize estimated at $100 worth of makeup.  All you have to do to enter is send in your information here as well as a clear picture of your makeup look, and they'll take care of the rest until voting time.

You will be notified via their Facebook page when the pictures are up and running.  At this point, you need to get others to vote for your picture by "liking" it and sharing it with their friends.  At the end of the contest, the person with the most "likes" wins!  *If one of you ladies enter the competition, comment below and let us know, and we'll be sure to both vote for you, and place a notice in our blog that one of our readers is running, and the rest of you should go vote.*

The contest is now open and ready for registration!  Have at it girlies!

xx,
Emilyann

Saturday, January 21, 2012

Must or Bust: Revlon Colorburst Lip Butters

Hey, everyone, it's Emilyann tuning in again.

Today I have a review for you on a new product out in the drugstore makeup aisle.  I went to Ulta about a week ago and picked up a few things.  One of those things was one of the new Revlon Colorburst Lip Butters.  I've heard several beauty bloggers rave about these, so I decided to try it out myself.

What is your overall opinion?  I love this product.  It is not a lipstick, but it isn't a gloss or balm either.  The name says it all.  They have a very body-buttery texture.  I picked up the color 075 Lollipop which is a bright fuchsia color.  I don't go for bright makeup a lot of the time, but if I am going to go brighter, I almost always do it on my lips.  I thought at first this color would be too daring for me, but I took the chance.  Although it is a bit out of my comfort zone, I found it's actually really wearable.  You can wear it alone or with a shimmery gloss over.  I love it both ways.

How much have you worn/do you think you will wear this product? I've already worn it twice in the week that I've had it, so I have a feeling I'll be wearing it a lot, especially in the spring and summer as it is a summery color.

Is it practical? Yes, very.  It's longlasting and comfortable.  I love the look of lipstick, but I'm not a big fan of the hassle or the texture.  These lip butters feel like conditioners, but the color is pigmented and it has the look of a satin lipstick.

Is it expensive?  I think it's reasonably priced.  I got mine for $7.49 at Ulta, and while this might seem like a lot, higher end lipsticks usually range from 15-30 dollars.  I think here you are definitely paying for the product, and not the packaging or label, which is the case with a lot of higher end makeup.

Would you repurchase?  Definitely.  I'm already planning to go back soon to get more colors.

How is the packaging? Adorable and practical.  You can see the color both at the top and the bottom, making it ideal for upright lipstick holders. The top stays on and it's sturdy. Plus it's just super cute.

Are there things you dislike about the product? It isn't as longlasting as a lipstick, and needs to be reapplied halfway through the day.

Would you recommend this product? Yes!  Especially if you're like me where you want more pigment than a lip gloss, but you hate the texture of lipstick.  This is a great product, and I highly recommend it!

How many stars? I'd give this product four and a half stars. :)

What are some products you guys have been thinking about testing out?

xx,
Emilyann

Saturday, December 31, 2011

French Makeup

Hey!  It's Caroline. I've decided that the French style is my absolute favorite.

The French girls look like they just rolled out of bed, threw things on, and left.  There's nothing too "done" about their look, and yet they still look elegant and absolutely stunning.  

Today I filmed a tutorial on the laid back French makeup.  It's all about dewy, clear skin, a slight bit of color to the face, smoked out and messy shadow, dark lashes, and a "bitten" lip look.  

I hope you enjoy!  This was my first time trying to make a real makeup tutorial, so let me know what you think... I'm new to this.  I might do a voiceover next time instead of slides, but we shall see.  If you have any questions about the application, ask me in the comments below and I'll respond!

Happy new year!


-Caro

Monday, December 5, 2011

Natural Contouring


Sup, people?  It's Caro.  Contouring is tricky business!  It's hard to get that defined face shape we like, but I'm going to do my best to show you how and still look natural.

If you look at the pictures above, you can't really see the contouring.  That's the point!  Beware muddy brown lines under your cheekbones.  That may make your cheeks look prominent, but it will also make you look like you don't really know what you're doing.  We're young.  Natural, glowy finishes are what we want.

So I'm going to take these pictures and edit them to show you exactly where I put my bronzer, highlighter, and blush.  You'll be surprised!


Attractive, right?  I know.  Hot.

Anyway, this is just to show you roughly where I put my contouring.

Step 1:  Take a bronzer a few shades darker than your skin (cream bronzer is the most natural) and apply it under the cheekbones, right above the jaw line, down the sides of the nose, and up around your forehead down into your temples.

Step 2:  Use your favorite highlighter (shimmery ones are my personal favorite) and put it on the tops of your cheekbones, on your chin, on the bridge of your nose, on the center of your forehead, and right at the top sides of your nose.  You can even put a little dab on your cupid's bow above your lip if you're into the plump lip look.

Step 3:  If you're using cream products, blend out with a bit of your foundation (but if you do this, don't put on a whole face of foundation first.  Start with the contouring and THEN blend with your foundation).  If you're using powders, dust a bit of translucent powder onto a stiff kabuki brush and just blend, blend, blend.  For difficult areas, you can use your fingers to really work it out.

Step 4:  Use a pink blush and lightly blend it onto your cheekbones.  Don't smile and put it on the apples of your cheeks, because this messes with the shape we're creating.  Just sort of blend it into the area where the highlighter and bronzer meet.

And that's it.  If you go all out, this can be time consuming.  But the more you do it, the quicker you get.

Good luck!  Comment below if you have any questions and I'll be sure to answer.  Just.... don't leave the house with brown stripes all over your face and tell everyone I told you how to do it.  BLEND, BLEND, BLEND!!

Love,
Caroline

(And just for fun because I'm a fangirl)

Tuesday, September 27, 2011

{Three Things}


Hello all, Lillian here.  Today I'm going to share with you three "normal day" things I've delighted in. {New Makeup}  Now, I don't really wear all that much makeup, and often I just don't wear any, but I recently got a couple new products, and I love them.  Covergirl lashblastfusion Mascara and intense shadowblast eyeshadow/primer, and eyestudio master drama eyeliner.  They're pretty terrific.
 
{Yay for bracelets} I've been wearing these lovelies all the time.  Basically all summer.  Now that it's fall I need to find new arm candy/inspiration, but I still really like these. 

{Coeur de Pirate}  Lovely songs.

What have you delighted in?

{lillian}

Thursday, September 22, 2011

My Three Favorite Fall Makeup Trends

I just had to take a break from the body shape series and write this post.  It was calling to me.  "Caroline.... Caroline.... tell the world.... post... post it......"

I'm absolutely head-over-heels for fall's clothing trends, but I'm even more in love with the makeup!  I'll give you the run-down on my three favorite trends that are what's hot right now.


  • Bold, Berry Lips.
    • via
      via
      via
    • Exfoliate your lips using a scrub or your toothbrush, and apply some concealer.  The concealer will give you a blank, smooth canvas on which to apply your color, and it also acts as a primer.  Line your lips with a nude or berry pencil, to prevent bleeding, and then put on your berry lipstick or lipstain.  Always pair this lip with a neutral, warm-toned eyeshadow like brown or gold.

  • Metallic Eyeshadow
via
via


via
    • Prime your eyes and apply your favorite shimmery eyeshadow.  Either go for silvers and blacks, or browns and golds.  Matte is out for this season, and the dewy, glittered look is all in.  Focus the darker color on the outer part of your lid, and the lightest color on the inner corner and out towards the center.  This look is fun because it can be natural and light, like Drew Barrymore and Vanessa Hudgens here, or it can be bold and funky like Amanda Seyfried at the top.


via
  • Doll Lashes
via
via
    • This trend is also known as "spider lashes," but I think that confuses people.  I've seen people take this trend the wrong way, and when they do, they generally clump their eyelashes on purpose.  In actuality, you want to be very careful with your mascara wand and gently separate all of your individual lashes, especially on the bottom.  But once you've done that, let your mascara dry and do another coat or two after that so you get the full, wide-eyed effect.  I definitely had some trepidation with this trend, but once I tried it, I loved it and have been doing it every day since.
 And that's all for now, folks!  I hope you enjoyed it.  Tell me... what are your favorite fall makeup trends, or what makeup have you been doing lately that you love?

-Caroline

Monday, September 12, 2011

Possible Giveaway?

Hi, all!

I've entered a makeup competition hosted by 2nd Love Cosmetics on Facebook.  There are three great prizes, and three different winners.  Currently I am in third place.  The prize is a large supply of makeup, brushes, and travel cases.

Here's the deal.  If I win one of the three prizes, I plan on doing a giveaway here on the Dressing Room Door.  I'm not sure which articles I'm planning on giving away quite yet, but you guys will most definitely benefit if I indeed, do either stay at 3rd place, or even progress to 2nd or 1st.

So the good stuff-  how to enter this giveaway.


{Mandatory Entry}
Go and "like" 2nd Love Cosmetics on Facebook and then "like" my entry in the contest.  If you don't want useless likes on your page, you are more than welcome to "unlike" 2nd Love after you enter, it will not effect your vote or your entry. Make sure you leave a comment on this post letting me know that you voted for me. That will enter you into this giveaway.

{Optional Entry #1}
Share the link to my picture on your Facebook, Twitter, Buzz, Tumblr, Dailybooth, or blog.  Leave me a comment with the link.

{Optional Entry #2}
Tell your friends about the link.  If they vote for me, leave me their name in the comments!


Thanks, girls, you're the best!  I hope to share my profits with you, since you're the reason I'd even make it past one vote!

PS. Just to let you girls know, there's currently an Urban Decay Sale going on at Hautelook!  There's a bunch of great deals, so go take a look! 


Emilyann 

Friday, September 9, 2011

Back to the Basics Pt. 3 - Primers

I wouldn't be too shocked if you've never heard of primers.  They are not a necessity, however, they should be put in the category of basics because of how absolutely wonderful they are and the improvements they offer.  Those of us who use either foundation or eyeshadow have all experienced the side effects of not wearing a primer at one time or another.  Has your makeup ever appeared cakey, or disappeared halfway through the day?  What about your eyeshadow?  Has it faded, or creased more often then not?  A primer could be just what you need.

Face Primers


A face primer is used to create a clean canvas for your skin.  After you moisturize, apply a thin layer of a foundation primer and spread it onto every inch of your face with your fingers, focusing on the spots you put the most foundation. It will give your face a little bit of a clean, slippery texture.  Not slimey, a slippery dry sensation.  This preps your face, keeping it clean from the oil and toxins of the makeup.  It keeps your makeup looking fresh all day, prevents cakiness, and gives the skin a protective mask.

You can also use color-correcting primers.  If your skin is particularly blotchy and prone to redness, try a green primer.  The green is opposite red on the color wheel-  it will balance and cancel out the redness of your face.

Some good face primers:  123


Eye Primers


Eye primers are a lot like face primers.  They give eyeshadow and eyeliner staying power and a clean canvas that prevents creasing.  Before eyeshadow, eyeliner or mascara, apply a thin coat of an eye primer (do *not* use a face primer- they are not interchangeable) and blend with your ring finger.  Now you are free to apply eyeshadow and eyeliner galore.

I even use a matte, skin-colored eye primer on the days I don't wear eyeshadow, because it makes me look more awake, and cancels out any puffiness or veins I may have.  It just gives a clean finish.

Some good eye primers:  123


Quick note-  My next BTB will be on foundation.  Because there isn't one right or wrong way to do foundation-  I've asked the rest of the girls who apply foundation on a regular, daily basis, to share their routine!  Enjoy, ladies!

Emilyann

Friday, September 2, 2011

Q and A Part One

Here's the Q and A video!  I had to split it up into two parts, and this is the first.  And yes, I'm a rookie at filming these little guys, so bear with me.  And yes, I'm in my washroom.  And yes, I DO touch my hair a lot.

Let me know if the video doesn't work in your region, and I'll take the music out and try again.


This Polyvore is for the winter outfit question:
Winter Cute


The key is to layer thinner tops underneath stylish pieces, like funky, chunky sweaters, thick scarves, military jackets, and ponchos.  Skinny jeans and boots together is always a cute combo, and to switch it up, try boots underneath wider-leg jeans.  Use earrings and bags to give it your own personal touch.

The heat protectant I mentioned:


That's it for part one!  I'll get part two up as soon as I edit it.  :)

Love,
Caroline