Wednesday, September 14, 2011

Hello Beautiful People!


Hello Beautiful People!
My name is Lillian, and I am filling Josie's place as the magical seventh author for Dressing Room Door.  And as sad as I am that she is gone (sniff, I loved your posts Josie) I am entirely excited to be a part of this blog now!
So.  A bit about me so that you can add a bit of personality to the pictures here:
I have my own personal/fashion/photography/food/life blog over at Frills and Furbelows.  I love writing for it, but am a *little* sporadic in posting.  
I love fashion, and always am thinking up new ways to wear the clothing I have.  I love patterns and prints and color and texture, and don't really follow trends, just incorporate them subtly, when I like them.  As far as makeup goes, I don't do much.  I most often wear mascara.  Sometimes I'll add a bit of eyeliner or eyeshadow, and sometimes I'll go for a crazy color or cat-eye liner.  But I'm pretty simple.  For hair, I have super short hair, and enjoy messing it up as much as it will go and experimenting with crazy afro-like curls and such.  But really, I'm low-maintenance in regards to hair and makeup.  
I love photography.  Right now I am very into the documentation of things, so I always have my camera with me to take picture of whatever strikes my fancy.  
I, like the other wonderful DRD ladies am home schooled, and take classes with Veritas Press, which is an amazing online-school.  
I am a Christian, and love my Lord and Savior, Jesus Christ.  He's saved me from my daily sins, and given me a hope and joy of eternal life with Him!  
I have three younger siblings, and a wonderful mother and father (a photographer and landscape painter!)
So there.  A little blurb about me.  At some point soon, I will put up my bio up there ^^  under my name, with plenty of random bits of detail, but until then, I hope you can enjoy reading my posts, despite the fact that you don't know what I like best to eat for breakfast.  
{Outfit Details:  Top-hand-me-down, skirt-ARC, handmade, Shoes-Payless, Scarf-Target}
{Makeup Details: Covergirl lasblastfusion mascara in black, Covergirl intense shadow blast-brown[I love this stuff!]}
{Band-aid on Knee: I fell and scraped my knee while at the park.  Don't judge.}
 Ok, so a little bit more about my outfit.  
I wore this to my one day of "outside" co-op school, and just added the heels when I went to a casual-ish gallery opening for my father.  

I got this skirt at ARC Thrift store, and it's homemade!
I really liked the bright color and pattern, but the cut wasn't too flattering, so I pinned it up in the front like that, creating a "mullet-dress".  Just kidding that's a horrible thing to be compared to.  

Though you cannot see it very well, there are little veins of yellow and red in the skirt, and I thought this green best complimented it.  I had a darker, Kelly green scarf on earlier in the morning when it was chilly, and you can see it there in the second picture on my purse.  It added a bit more balance to the outfit, being darker.  

And the shoes.  I love these shoes.  I wear them with everything that requires a heel.  Pretty much.  They're a great color and shape that hasn't really gone in or out of style, so it's pretty easy to add to any and every outfit.  

I love it when the weather is cooler, as it is now, because I can begin to layer and wear more patterns as the weather gets colder.  Where as summer: not so much.  

So there you have it!  

Feel free to contact me via the dressing room door email, I would love to answer your clothing/style questions!

{love}
{lillian}


Tuesday, September 13, 2011

I think I've finally mastered this tripod business.

In short: You, my chicken legged friends, are getting your last post from me. YEP. This is it. This post is ITTTTTT. Case you didn't hear the first time. It's just because I can't keep up with blogging and school this year... After I leave the blog, that wonderful guest poster Lillian who posted on "back to school" stuff, is taking my place. So, this is gonna be great. Mainly because we will still/then have the magical number 7 of posters, not to mention Lillian is a super super superrrrrr awesome fashion blogger.

I'm going to be talking about the amazing wardrobe flexibility of button downs, and I'm going to answer this question from Caroline L.
"5) Last but not least, Josie, would you please do a tutorial on how you make up your eyes? Please?! They always look so fabulous that I want to know your secrets."

(You should always use good grammar and punctuation. You never know if your comment will be featured in a blog post. Good job, Caroline... ;))
I'm honored by your compliment, and honestly, I don't think I do anything that special. The only things I can think of are: that either the eye products I commonly use are very attractive, the way I edit my pictures (I use Picnik, normally), the way my eyes look in photographs, or the fact that I put plenty of mascara on my bottom lashes.


Products I use on my eyes (normally):
CoverGir: Lash Blast volume enhancing, black, waterproof mascara.
Eyeshadows:
Hard Candy eyeshadow duo in Love Bug.
Palladio baked eyeshadow trio in Pink Bliss.
Physician's Formula blush in Natural Pearl. (Yes, I use it on my eyes, too.)
Almay Pure Blends in Oatmeal and some purple shade...I'm not sure they sell this anymore.

Occasionally I use an ELF palette, this brush set, or this primer. But honestly, I usually just use my finger and smack some on.
Here are a couple pictures:

When I'm being fancy, I'll apply the primer listed above and apply a slightly noticeable skin colored eye shadow.
With this, I applied the blush listed about all over my lid with an eye shadow brush and applied a dark grey/black color a long my lash line.
This is just with the Oatmeal color listed above applied by my finger. Also, normally that's how I leave my mascara. So. Yep. (And I don't use an eyelash curler or anything...)
So button downs: THEY ARE SO VERSATILE. I have several of them. In these pictures is just a plain blue ruffled Ralph Lauren shirt. Button downs can be dressed up or down, worn all four seasons, and is always, always, always in style. You can wear them with just skinny jeans and a cute thin belt or you can do some of these things:

Skirt: H&M
Sweater: Aeropostale
Belt: Jordache
Boots: Born
These shirts look ADORABLE underneath cardigans. One of my favorite ways to wear them.
Shorts: DIY
Belt: Aeropostale
Bracelet: Vintage

This is such a cute casual look, plus it's totally in right now.
Dress: H&M
Belt: Fossil

These shirts look amazing underneath dresses. Plus they make a great transitional piece so you can wear your favorite summer dresses in fall/winter/spring! (PS: isn't the horse print of this dress TO DIE FOR??)
Blazer: Tommy Hilfriger
Jeans: NY&C
Belt: Fossil
Shoes: Clarks
And of course, the very traditional (sometimes!) way of wearing a blazer on top.
Altogether, button downs make great investments, so go buy more NOW.

God bless y'all,
Josie.

Monday, September 12, 2011

Possible Giveaway?

Hi, all!

I've entered a makeup competition hosted by 2nd Love Cosmetics on Facebook.  There are three great prizes, and three different winners.  Currently I am in third place.  The prize is a large supply of makeup, brushes, and travel cases.

Here's the deal.  If I win one of the three prizes, I plan on doing a giveaway here on the Dressing Room Door.  I'm not sure which articles I'm planning on giving away quite yet, but you guys will most definitely benefit if I indeed, do either stay at 3rd place, or even progress to 2nd or 1st.

So the good stuff-  how to enter this giveaway.


{Mandatory Entry}
Go and "like" 2nd Love Cosmetics on Facebook and then "like" my entry in the contest.  If you don't want useless likes on your page, you are more than welcome to "unlike" 2nd Love after you enter, it will not effect your vote or your entry. Make sure you leave a comment on this post letting me know that you voted for me. That will enter you into this giveaway.

{Optional Entry #1}
Share the link to my picture on your Facebook, Twitter, Buzz, Tumblr, Dailybooth, or blog.  Leave me a comment with the link.

{Optional Entry #2}
Tell your friends about the link.  If they vote for me, leave me their name in the comments!


Thanks, girls, you're the best!  I hope to share my profits with you, since you're the reason I'd even make it past one vote!

PS. Just to let you girls know, there's currently an Urban Decay Sale going on at Hautelook!  There's a bunch of great deals, so go take a look! 


Emilyann 

Makeup Brushes: 101

Hey guys, it's Amanda!

We recently received a request to do a post on makeup brushes. So this post is about which brushes are for what, which ones you should have, and some suggested brands. There are dozens of different kinds of brushes out there, and it can get confusing, especially if you just want the basics. Hopefully this helps.

Let's start with face brushes. You should definitely have a foundation brush. As you could probably guess, a foundation brush is for applying, distributing, and blending foundation onto your face. MAC's 190 Foundation Brush is a good (although pricey) option, but if you want something less expensive, try stila's #27 foundation brush.


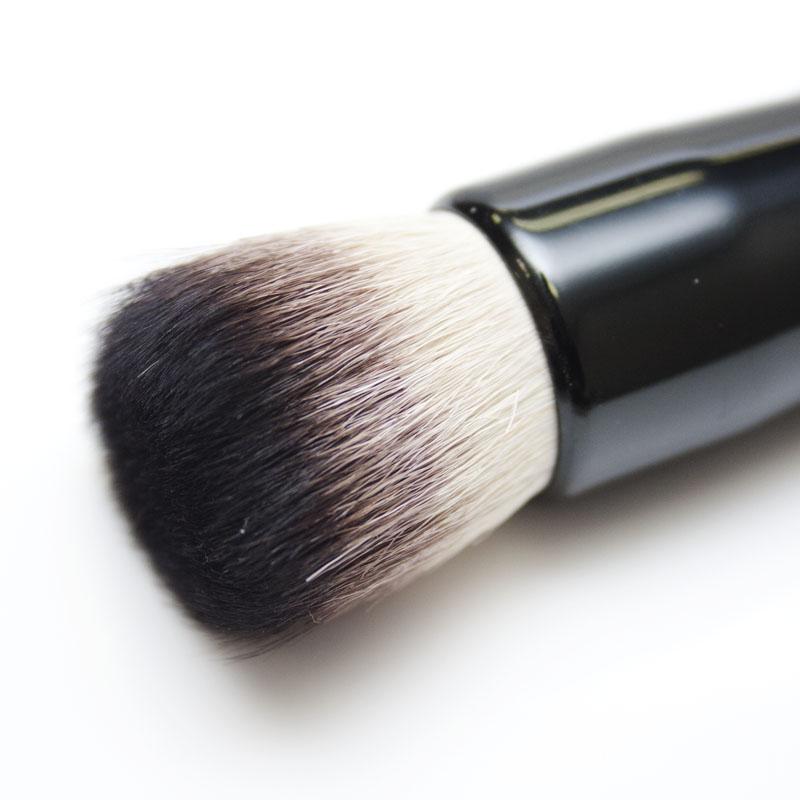
Another option for foundation is a stippling brush. Stippling brushes can be used to apply foundations, creams, and powders by dotting or patting them onto your face. I actually prefer them to foundation brushes, but that's just me. MAC's 130 is amazing (I use it every day), or try Ulta's Stippling Brush.


Next is the concealer brush. This is another brush you should have, and it is used for applying concealer. This is pretty basic, so there's no need to splurge on a super expensive one. Check out Revlon's Concealer Brush or even e.l.f.'s Studio Concealer Brush.


The last face brush you should know about is the blush/powder brush. There are blush brushes (for applying blush) and powder brushes (slightly larger than blush brushes and for applying powder), but they are so similar in shape and size, you may as well just buy one. If you're not sure what size to get, opt for a slightly larger one, or a powder brush, as larger brushes hug the cheeks and actually apply blush better. As usual, MAC has a good one (129 Powder/Blush Brush), and you could also try Sonia Kashuk's Powder Brush.


Now let's look at some eye brushes. First, you should have a basic eyeshadow brush, to apply eyeshadow. These come in different sizes and shapes, but you'll probably want something with slightly rounded edges and firm bristles, like MAC's 239 Eye Shader Brush or e.l.f. professional's Eye Shadow Brush.


Another good brush to have is a blending brush. Blending brushes are used to blend eyeshadows on the eye and create a softer look, and they're usually longer than an eyeshadow brush with softer bristles. Try Sephora's Classic Blending Eye Brush or e.l.f.'s Mineral Blending Eye Brush.


You might also like a smudge brush. These are usually short and curved, with dense bristles to deposit more concentrated color. You usually use a smudge brush when doing a smoky eye, smudging color, and softening lines. Check out Japonesque's Mineral Smudger Brush  or as always e.l.f. has a cheaper alternative, the Essential Smudge Brush.


If you use liquid or cream eyeliners, you'll want an eyeliner brush. These can either be long and pointed or angled; use whichever you're more comfortable with. These are stiff, designed to apply the liner smoothly and give you control over the line. A good angled brush would be Sephora's #15 Classic Angled Brush, and if you prefer a straight brush, try MAC's 209 Eye Liner Brush.

There are many more different kinds of brushes out there, but these are the basics. Try different brush shapes and brand to find the ones that work for you. And don't feel like you have to pay an arm and a leg just for some brushes. A lot of times the cheaper ones work just fine (e.l.f.'s brushes are great to start with and to get used to the different kinds). When you're buying, just tug gently at the bristles to make sure they're not going to fall out. And of course clean your brushes regularly with water and gentle soap.

Hope this helped! As always, feel to free to let us know if you have any questions or any more requests. We're more than happy to help. :)

Much love,
Amanda

Friday, September 9, 2011

Back to the Basics Pt. 3 - Primers

I wouldn't be too shocked if you've never heard of primers.  They are not a necessity, however, they should be put in the category of basics because of how absolutely wonderful they are and the improvements they offer.  Those of us who use either foundation or eyeshadow have all experienced the side effects of not wearing a primer at one time or another.  Has your makeup ever appeared cakey, or disappeared halfway through the day?  What about your eyeshadow?  Has it faded, or creased more often then not?  A primer could be just what you need.

Face Primers


A face primer is used to create a clean canvas for your skin.  After you moisturize, apply a thin layer of a foundation primer and spread it onto every inch of your face with your fingers, focusing on the spots you put the most foundation. It will give your face a little bit of a clean, slippery texture.  Not slimey, a slippery dry sensation.  This preps your face, keeping it clean from the oil and toxins of the makeup.  It keeps your makeup looking fresh all day, prevents cakiness, and gives the skin a protective mask.

You can also use color-correcting primers.  If your skin is particularly blotchy and prone to redness, try a green primer.  The green is opposite red on the color wheel-  it will balance and cancel out the redness of your face.

Some good face primers:  123


Eye Primers


Eye primers are a lot like face primers.  They give eyeshadow and eyeliner staying power and a clean canvas that prevents creasing.  Before eyeshadow, eyeliner or mascara, apply a thin coat of an eye primer (do *not* use a face primer- they are not interchangeable) and blend with your ring finger.  Now you are free to apply eyeshadow and eyeliner galore.

I even use a matte, skin-colored eye primer on the days I don't wear eyeshadow, because it makes me look more awake, and cancels out any puffiness or veins I may have.  It just gives a clean finish.

Some good eye primers:  123


Quick note-  My next BTB will be on foundation.  Because there isn't one right or wrong way to do foundation-  I've asked the rest of the girls who apply foundation on a regular, daily basis, to share their routine!  Enjoy, ladies!

Emilyann

Wednesday, September 7, 2011

Flattering Trends Part 2: Pleats

Hey, y'all, it's Caroline!  I'm back with more trends for your body shape.  For reference, check out the first one here.  :)

Today I'm talking about pleats.  This style has been "in" all summer, and is continuing through the fall.  The problem is... it can be hard to find a way to wear it without completely losing your shape, or without widening you too much.  So here's how every body type can incorporate it well into their wardrobe.

Rectangle:
Type 1
Rectangle One - Pleats

You can wear the ever-popular pleated skirts with ease.  Throw on a loosey-goosey top, or even a t-shirt, tuck it in, and cinch your waist with a belt, and you've got a great look!  When pairing with shoes, go for fun colors or quirky oxfords.


Rectangle:
Type 2

Rectangle Type 2 - Pleats

Keep your pleats very simple.  Go for gorgeous, flowy blouses with some pleated detail, or even some jewelry with a similar look.  Pair with your favorite jeans and a funky pair of wedges, if you dare.


Apple:

Apple - Pleats


Because your upper half is fuller than your lower half, wear pretty dresses with little to no pleating on top, and with a-line shapes that have narrow pleats.  Give it some oompf with fun shoes, but go simple on the jewelry.

Pear:


Pear Pleats


Go crazy with the pleats on your top half, and then balance it out with some jeans and some fun heels.  Granted, you have to wear what you're comfortable with, so wear flats if you need to!  But a pair of cute wedges or pumps will just lengthen those legs and make your fuller lower half look a little narrower.  Avoid pleated skirts, which will make your hips look wider.


Hourglass:

hourglass pleats


With an hourglass figure, you can copy Rectangle 1 and cinch a pleated skirt at the waist, or you can be a little different and wear one under a chunky sweater with an a-symmetrical hem.  Pair with colored flats and preppy tops, and you've got a very hip look.


That's all for today!  Remember, buy what you feel comfortable wearing and don't hesitate to get a second opinion.  But don't wear a trend just because it's "in," wear it when it really enhances you and makes you look your best.  

-Caroline

from a californian who hasn't quite switched out of summer mode yet.


It was just a glasses kind of day. :)

Outfit
Top -- H&M
Shorts -- Delia's
Shoes -- From a huge department store full of discount women's shoes. I can't remember what it's called...but the brand is Seychelles. :)
Nails -- Peach Petal by Revlon
Face
Eyes -- Naked Lunch by Mac on the lid
Mascara -- Maybelline's One by One Waterproof
Liner -- None on top, and a little bit of Covergirl Liquiline Blast in blue on the bottom
Blush -- Loreal's True Match in Innocent Flush

Hair -- Second day curls done with a curling wand similar to Conair's.

 This is a pretty simple outfit, but I love it because of the shoes.  I about swooned when my mom showed them to me. Can you say gorgeous? They will be great for fall and I can't wait to wear them with a dress and tights. Oh Yeah.

A few things that I've been thinking are especially cute: 1, 2, 3, 4.

-Valentine 

Q and A Part Two

Hey, it's Caroline!

I finally got the time to edit and upload part two of the Q and A videos, so here you go!  (And if you're wondering, yes, I did forget to put music in this video.


If you have more questions, go ahead and ask them either by emailing us at dressingroomdoor(at)gmail(dot)com, or by asking on formspring!  I'll pick a few of these questions and do my best to put up at least one video every month, so keep asking!

Thanks for sticking around, y'all!

Friday, September 2, 2011

Q and A Part One

Here's the Q and A video!  I had to split it up into two parts, and this is the first.  And yes, I'm a rookie at filming these little guys, so bear with me.  And yes, I'm in my washroom.  And yes, I DO touch my hair a lot.

Let me know if the video doesn't work in your region, and I'll take the music out and try again.


This Polyvore is for the winter outfit question:
Winter Cute


The key is to layer thinner tops underneath stylish pieces, like funky, chunky sweaters, thick scarves, military jackets, and ponchos.  Skinny jeans and boots together is always a cute combo, and to switch it up, try boots underneath wider-leg jeans.  Use earrings and bags to give it your own personal touch.

The heat protectant I mentioned:


That's it for part one!  I'll get part two up as soon as I edit it.  :)

Love,
Caroline

Thursday, September 1, 2011

Back to the Basics Pt. 2 - Eyeliner

Oh, yes.  We've all seen it.  It creeps up behind us at the pool, and at volleyball games.  It lurks in the shadows, waiting to reveal itself.  We've all seen, and almost all, have been, this dreaded beast.

The raccoon.


Although you may think you look all rocker chic like Taylor Momsen...


You really just look like this...


Yeah. 
Let's fix this, shall we? 

Eyeliner is not eyeshadow.  It isn't meant for your whole eye.  "Oh, but NYX has a line of jumbo eyepencils!" Yes.  Yes they do.  Those are bases for your eyeshadows.  Not eyeliners. 

Confusing these two products, eyeliner, and eyeshadow, can be traumatizing.  Confusing types of eyeliners can be traumatizing.  So let's beat eyeliner to it's punch and learn how to use it properly.  

Pencil Eyeliners

A pencil eyeliner is the first eyeliner you should ever pick up.  This eyeliner is used for your waterline and your tightline.  What's your water line?  Your waterline is where your eyesocket meets your eye.  It's located above your lashline, which, obviously, is the line that all of your lashes are found.  Lining the waterline can be tricky.  You don't want this area to be too dark because then the raccoons inevitably come out to play.  If you're going for a more natural look, go with a light brown eyeliner on the first third of your waterline, from the outercorner in. This will frame your eyes and brighten the whites of your eyes without raccoon effect. 
As for your tightline, this line is directly beneath your upper lash line.  This type of lining your eyes can be a bit initimidating, but is absolutely worth it. Lining your tightline will enhance your lashes, making them look darker and fuller. Once you grow accustomed to performing this type of line, it becomes second nature.  Remember the first time you put on eyeliner at all?  How your eyes and skin were so sensitive and watered?  Tightlining will feel like that for a while. All you do is lift your eyelid a tad so you can see the skin underneath the lashes. That's where you line. Remember you probably won't feel comfortable with it the first time.  Practice makes perfect. 

For the waterline, I'd recommend a waterproof eyeliner, seeing as it will be weathering tears, sweat, watery eyes, eyedrops, etc.  Try the Revlon Color Stay Eyeliner .  It lasts up to 16 hours and glides on without tugging or pulling at your eyes or lashes.

For your tightline, you need something easy and fast. I recommend a coal liner, like MAC's Kohl Eyeliner. It's very pigmented and will make the lashes appear fuller and darker. Always use a tightline color that is the same as your mascara. 

Liquid, Gel, and Cream Eyeliners

These eyeliners are secondary eyeliners, to be used after the tightline eyeliner and waterline eyeliner is applied.  To keep a look more natural, ditch these babies, and stick to the pencil.  But if you're looking for more of a "makeuped" look, here's your guide.  Use liquid, gel, or cream eyeliners for your top lashline.
  Using a thin eyeliner brush, like the Sigma E05, for the gel or cream, or the built in brush, with the liquid eyeliner, apply on and right above the lashes.  Start at the  outercorner and come in-  you want the line to be thicker on the outer corner and thinner at the inner.  This will make your eyes appear bigger, wider, and brighter.  If you prefer, wing it out slightly, dragging the brush up and out.   Whether you choose liquid, gel, or cream is simply a matter of preference.  No one is "better" than the other.  However, you probably will find you prefer one consistency over the other.  Explore!  Find out what you like best.  

The three products I recommend are these:  For liquid- the ELF Waterproof Eyeliner Pen  (a thinner, more maneagable consistency) and Urban Decay Liquid Liner (heavier consistency).  For gel- Bobbi Brown Gel Eyeliner or Maybelline Eyestudio Gel Eyeliner.  For cream, Loreal Hip Cream Eyeliner or ELF Studio Cream Eyeliner.

Tips and Tricks 
  • Use a white eyeliner on your waterline to brighten your eyes and appear more awake!  This is a great tip for back to school if you go to a brick and mortar school.  Early mornings are no fun, but white eyeliner will make you look like you've been up for a while.
  • Using a smudge brush on your lashline after applying a cream eyeliner will give you a smokey effect, you won't even need eyeshadow!  But remember to smudge on the upper lashline, and ONLY A LITTLE.  No raccoon eyes, ladies. 
  • Using different colored eyeliners will enhance your eyes.  If you have green eyes, try a plum color.  If you have blue, try a dark brown.  Brown eyes will be complimented by any color.
Good luck, ladies!  Foundation/Concealer BTB coming up next, so stay tuned.  

Emilyann